
前回の続きになります。前回の記事はこちら。「パターン3.Web上でボットとチャットする(Pythonパッケージで作成)」の後半の説明です。

ボットのプログラムを動かしてみる
Djangoで作成した初期ファイル群に対して以下のように修正を加えます。できたら、「heroku local web」でローカル(自分のPC)で動かすか、前回説明したやり方で「git push heroku main」まで実行してHerokuサーバー上で動かしてください。
ローカルだとURLは「http://127.0.0.1:(指定したポート番号。デフォルトは8000)/chatbot1/」サーバーだとURLは「https://(アプリ名).herokuapp.com/chatbot1/」です。
なお、このプログラムは、
を引用し、修正を加えて作成させて頂きました。
また、Herokuは無料版だと、30分アクセスがないとsleepモードになり画面表示に時間がかかります。まあ、無料だし仕方ないですね。
まずは各フォルダ・ファイルの構成図です。コマンドプロンプトを立ち上げ、treeコマンドで表示します。
C:\github\ chatbot_project >tree /f
C:.
│  .env
│  .gitignore
│  app.json
│  manage.py
│  Procfile
│  Procfile.windows
│  README.md
│  requirements.txt
│  runtime.txt
│
├─.github
│      PULL_REQUEST_TEMPLATE.MD
│
├─chatbot1
│  │  admin.py
│  │  apps.py
│  │  models.py
│  │  tests.py
│  │  urls.py
│  │  views.py
│  │  __init__.py
│  │
│  ├─migrations
│  │  │  __init__.py
│  │  │
│  │  └─__pycache__
│  │          __init__.cpython-39.pyc
│  │
│  ├─static
│  │  ├─css
│  │  │  │  bootstrap.min.css
│  │  │  └─ style.css
│  │  └─js
│  │      │  dev-vue.js
│  │      └─ script.js
│  │
│  ├─templates
│  │      base_bot.html
│  │      home.html
│  │
│  └─__pycache__
│
├─chatbot_project
│  │  settings.py
│  │  urls.py
│  │  wsgi.py
│  │  __init__.py
│  │
│  ├─static
│  │
│  └─__pycache__
│
└─staticfiles

(略)
次にchatbot_projectフォルダのファイルのソースです。修正したもののみ。
[urls.py](プロジェクトの方)

from django.urls import path, include

(略)

# Djangoのurls.pyは上から順番にURLのパターンマッチを探すので、順番は大事です。
urlpatterns = [
    path('chatbot1/', include('chatbot1.urls')),

   (略)

    path("admin/", admin.site.urls),
]
[settings.py]

(略)

import os
import django_heroku

(略)

# Application definition
INSTALLED_APPS = [
    "django.contrib.admin",
    "django.contrib.auth",
    "django.contrib.contenttypes",
    "django.contrib.sessions",
    "django.contrib.messages",
    "django.contrib.staticfiles",
    "chatbot1",
]

(略)
次からはchatbot1フォルダのファイルのソースです。こちらも追加・修正したもののみ。
[urls.py] (アプリケーションの方)

from django.urls import path

from . import views

urlpatterns = [
    path('', views.index, name='index'),
    path('get-response/', views.get_response, name='get_response'),
]
[views.py]

from django.http import HttpResponse
import cgi
from django.shortcuts import render
import json
from django.views.decorators.csrf import csrf_exempt
from chatterbot import ChatBot
from chatterbot.trainers import ListTrainer


def index(request):
    return render(request,"home.html")


chatbot = ChatBot('チャットボット1号')
trainer = ListTrainer(chatbot)

trainer.train([
    "こんにちは",
    "はじめまして!!",
])

trainer.train([
    "調子は?",
    "元気元気!",
    "それはよかった",
])

@csrf_exempt
def get_response(request):
	response = {'status': None}

	if request.method == 'POST':
		data = json.loads(request.body.decode('utf-8'))
		message = data['message']

		chat_response = chatbot.get_response(message).text
		response['message'] = {'text': chat_response, 'user': False, 'chat_bot': True}
		response['status'] = 'ok'

	else:
		response['error'] = 'no post data found'

	return HttpResponse(
		json.dumps(response),
			content_type="application/json"
		)
次は、chatbot1フォルダの下のtempletesフォルダのファイルです。
[home.html]

{% extends 'base_bot.html' %}
{% load static %}

{% block js %}
  <script type="text/javascript" src="{% static 'js/script.js' %}"></script>
{% endblock %}

{% block content %}

<div id="app" class="container top-padding">
	<div id="text-box" class="row top-padding">
  	  <div class="col-md-12">
		<textarea class="form-control" v-bind:placeholder="placeholder" v-model="input" v-bind:class="{ 'border-danger': send_blank}" v-on:change="check_content"></textarea>
		<i class="fas fa-arrow-alt-circle-down send-btn" v-on:click="add_message"></i>
	  </div>
	</div>
	<div class="row">
		<div class="col-md-12">
			<div class="card col-md-6" v-for="message in messages" v-bind:class="{ 'user-message': message.user,  'chat-message': message.chat_bot, 'offset-md-6': message.chat_bot}">
				<div class="card-body">
					[[message.text]]
				</div>
			</div>
		</div>
	</div>


</div>
{% endblock %}
[base_bot.html]

<!DOCTYPE html>
{% load static %}
<html>
<head>

	<meta charset="utf-8"/>

	<link rel="stylesheet" type="text/css" href="/static/css/bootstrap.min.css">
	<link rel="stylesheet" type="text/css" href="/static/css/style.css">
	<link rel="stylesheet" href="https://use.fontawesome.com/releases/v5.0.13/css/all.css" integrity="sha384-DNOHZ68U8hZfKXOrtjWvjxusGo9WQnrNx2sqG0tfsghAvtVlRW3tvkXWZh58N9jp" crossorigin="anonymous">
	<script type="text/javascript" src="/static/js/dev-vue.js"></script>

	{% block css %} {% endblock %}
	{% block js %}{% endblock %}
</head>
<body>
	{% block content %}{% endblock %}
</body>
</html>
最後に、staticフォルダの下のjsとcssです。なお、bootstrap.min.css、dev-vue.jsはフレームワークです。詳しくは、それぞれのWebサイトをご確認下さい。bootstrap.min.cssはこちら、dev-vue.jsはこちらです。
[script.js]

window.onload = function () {

	var app = new Vue({
	  delimiters: ['[[', ']]'],
	  el: '#app',
	  data: {
	    messages: [],
	    input: '',
	    send_blank: false,
	    placeholder: 'Send a message to the chatbot...',
	  },
	  created: function() {

	  },
	  methods: {
		add_message: function() {
			if (this.input.length > 0) {
				var message = {
					'text': this.input,
					'user': true,
					'chat_bot': false,
				};
				this.messages.push(message);
				this.input = '';

				this.send_blank = false;
				this.placeholder = "Send a message to the chatbot...";

				fetch("/chatbot1/get-response/", {
			        body: JSON.stringify({'message': message['text']}),
			        cache: 'no-cache',
			        credentials: 'same-origin',
			        headers: {
				        'user-agent': 'Mozilla/4.0 MDN Example',
				        'content-type': 'application/json'
			        },
			        method: 'POST',
			        mode: 'cors',
			        redirect: 'follow',
			        referrer: 'no-referrer',
			        })
			        .then(response => response.json()).then((json) => {
			          	this.messages.push(json['message'])
			    	})
			} else {
				this.send_blank = true;
				this.placeholder = "Please put in some text";
			}

		},
		check_content: function() {
			if (this.input.length > 0) {
				this.send_blank = false;
				this.placeholder = "Send a message to the chatbot...";
			} else {
				this.send_blank = true;
				this.placeholder = "Please put in some text";
			}
		},
	  }
	});
};
[style.css]

.top-padding {
	margin-top: 10px;
}

.user-message {
	background-color: rgba(0, 67, 255, 0.33);
}

.chat-message {
	background-color: rgba(128, 0, 95, 0.35);
}

.send-btn {
	position: absolute;
    top: 12px;
    font-size: 30px;
    color: grey;
    right: 20px;
}

.send-btn:hover {
	color: rgba(0, 128, 0, 0.61);
}

#text-box {
	position: static;
	bottom: 8px;
	width: 95%;
}

#text-box textarea {
	border: 2px solid;
}

.navbar {
	background-color: #0006;
}

#app {
	margin-left: 0px;
}

#app .card {
	margin-bottom: 5px;
}

#app p {
	margin-bottom: 0px;
}
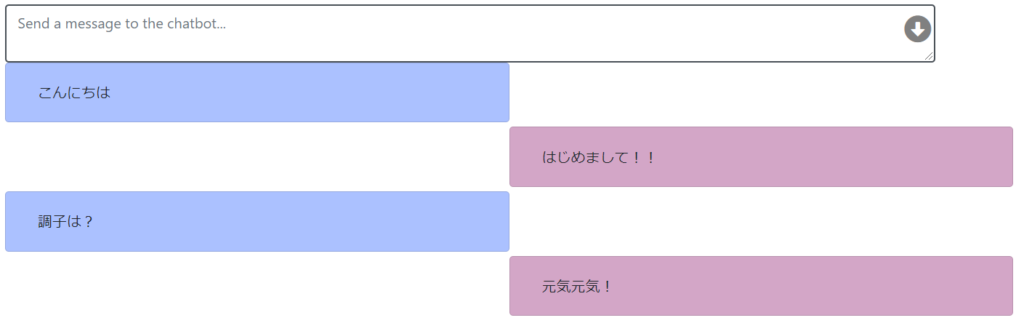
以上を配置して、サーバーに配置、実行すると、以下のような画面が出て、ボットとやりとりできます。
まとめ
この記事では、PythonのWebフレームワークDjangoを使って、Heroku上で簡単なチャットボットを動かすところまでやってみました。
私は、herokuにローカルで作成したファイルを反映(push)(git push heroku main)するところで、Pythonパッケージのバージョン不整合エラーになり、pushが何度か失敗しました。そういったときは、requirements.txtのバージョンを「chatterbot>=0.7.6,<0.7.7」といった感じで、あえて最新版を使わずバージョン整合性がとれるように調整してみて下さい。